# 说在前面

本文的 Web 环境为 Windows + Nginx + 腾讯云

  • Nginx
  • Certbot
  • 最后支持 Windows 的 Certbot

# 需求

  • Web 服务器在本地
  • 80 端口开放

# 步骤

# 安装 Certbot

# 申请证书

在终端中输入 certbot certonly 启动申请向导

# 选择验证方式

1
2
3
4
5
6
7
8
9
10
11
12
13
14
15
PS C:\Certbot> certbot certonly
Saving debug log to C:\Certbot\log\letsencrypt.log

How would you like to authenticate with the ACME CA?
- - - - - - - - - - - - - - - - - - - - - - - - - - - - - - - - - - - - - - - -
1: Runs an HTTP server locally which serves the necessary validation files under
the /.well-known/acme-challenge/ request path. Suitable if there is no HTTP
server already running. HTTP challenge only (wildcards not supported).
(standalone)
2: Saves the necessary validation files to a .well-known/acme-challenge/
directory within the nominated webroot path. A seperate HTTP server must be
running and serving files from the webroot path. HTTP challenge only (wildcards
not supported). (webroot)
- - - - - - - - - - - - - - - - - - - - - - - - - - - - - - - - - - - - - - - -
Select the appropriate number [1-2] then [enter] (press 'c' to cancel):

提供了两种验证域名是否是你拥有的方式

  • Certbot 自启动一个 Web 服务器, Let's Encrypt 会通过 80 端口访问这个域名,寻找 /.well-known/acme-challenge/ 路径下的特定文件
  • 你提供现有服务器的网站文件路径,Certbot 会放置一个文件到 /.well-known/acme-challenge/ 目录下,之后 Let's Encrypt 会尝试访问这个文件

由于我们有 Nginx,所以选择 2

# 填写域名与文件路径

1
2
Please enter the domain name(s) you would like on your certificate (comma and/or
space separated) (Enter 'c' to cancel):

在此处输入域名

1
Input the webroot for assets.hellobaka.xyz: (Enter 'c' to cancel):

此处输入文件路径,例如我在 Nginx 中这个域名的配置如下:

1
2
3
4
5
6
7
8
server
{
listen 80;
server_name assets.hellobaka.xyz;
location / {
root E:/static;
}
}

那么就填入 E:/static

此时不出意外的话,证书就正常获得到了

1
2
3
4
5
6
7
8
9
10
11
12
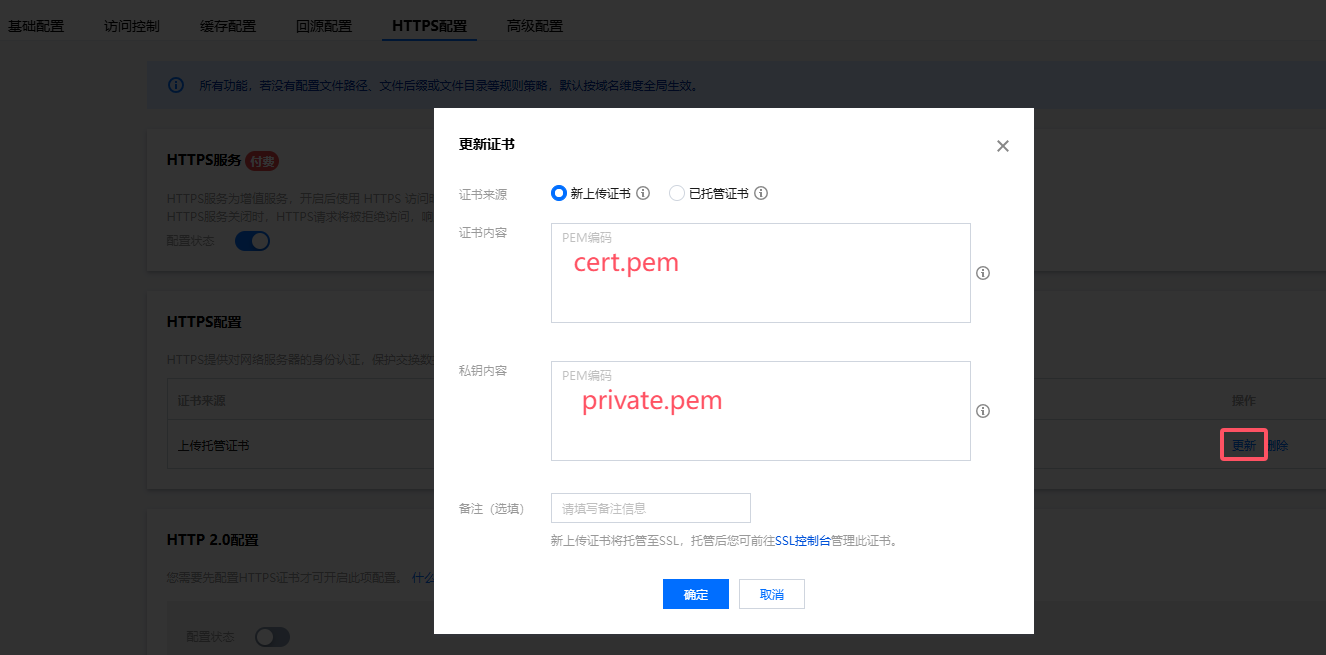
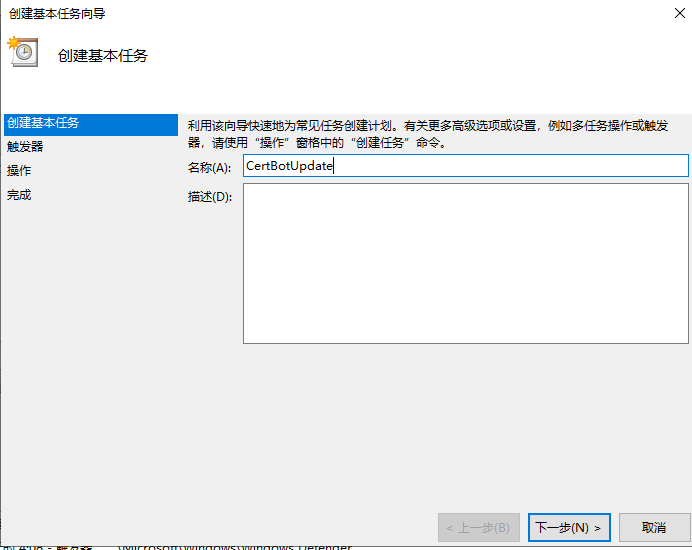
Successfully received certificate.
Certificate is saved at: C:\Certbot\live\assets.hellobaka.xyz\fullchain.pem
Key is saved at: C:\Certbot\live\assets.hellobaka.xyz\privkey.pem
This certificate expires on 2024-11-07.
These files will be updated when the certificate renews.
Certbot has set up a scheduled task to automatically renew this certificate in the background.

- - - - - - - - - - - - - - - - - - - - - - - - - - - - - - - - - - - - - - - -
If you like Certbot, please consider supporting our work by:
* Donating to ISRG / Let's Encrypt: https://letsencrypt.org/donate
* Donating to EFF: https://eff.org/donate-le
- - - - - - - - - - - - - - - - - - - - - - - - - - - - - - - - - - - - - - - -

# 证书配置

Certbot 将证书放置在了 live 文件夹下,其中 pem 文件是通过软链接放置的,在证书换新之后无需手动操作文件,Certbot 会自动更新软链接的目标

# Nginx

我们新建一个 443 的配置,来实现 Https 访问

1
2
3
4
5
6
7
8
9
10
11
12
13
14
15
server
{
listen 443 ssl;
server_name assets.hellobaka.xyz;
ssl_certificate "C:/Certbot/live/assets.hellobaka.xyz/fullchain.pem";
ssl_certificate_key "C:/Certbot/live/assets.hellobaka.xyz/privkey.pem";
ssl_session_cache shared:SSL:1m;
ssl_session_timeout 10m;
ssl_ciphers HIGH:!aNULL:!MD5;
ssl_prefer_server_ciphers on;

location / {
root E:/static;
}
}

和 80 配置相比,新增了很多 ssl 配置,其中路径需要配置成上文获取到的证书路径

# Http 重定向至 Https

我们希望废止 Http 的访问,将请求重定向到 Https 上,但是由于 Certbot 自动更新证书还需要通过 80,我们就需要编写规则来仅让这个请求通过 Http,其他请求都转发到 Https

1
2
3
4
5
6
7
8
9
10
11
12
13
server
{
listen 80;
server_name assets.hellobaka.xyz;

location /.well-known/ {
root E:/static;
}

location / {
return 301 https://$host$request_uri;
}
}

此处我们修改了规则,使除了自动更新证书以外的请求都用 301 重定向至 Https

# 更新 CDN 证书

腾讯云的 CDN 的 Https 请求允许上传自托管证书,按下图所示将证书内容填入其中即可
5.png

# 自动更新

我们使用 Windows 的 计划任务 来实现

# 验证自动更新是否可用

打开终端窗口,输入 certbot renew --dry-run ,此指令是模拟进行一次自动更新
查看是否有错误产生,若没有错误产生则可以进行下一步

# 添加计划任务

打开计划任务,点击右侧的添加基本任务
6.png

之后填写名称与备注。触发器选择每周六触发。之后选择启动程序。
不是每次运行自动更新都会重新申请证书,当证书还有 30 天过期时,才会重新申请证书。

此时暂时把窗口放到旁边,我们来编写一个触发脚本

# 编写触发脚本

我们在 Certbot 路径下新建一个 update_certbot.bat 的脚本文件,之后向其中填入内容

1
2
@echo off
certbot renew --quiet

# 完成计划任务

返回计划任务窗口,在程序或脚本中选择刚才编写的脚本。

自此,完成了 SSL 证书的申请、应用与自动更新,唯一需要手动操作的是 CDN 证书的更新,不过好像有类似的脚本可以辅助完成。三个月手动操作一次感觉也没啥问题。